Saturday, 18 January 2014

Small icon


Hi crafter's


This is going to be my entry for the Indigoblu challenge which is about your favourite stamp. Mine is the Wild Meadow, especially the flourish, which I find myself turning to all the time. I recently bought a small wooden icon from Crafty Individuals and was looking for a way to use it, this project seemed the perfect thing. The first thing I did was cover the wood with a layer of white gesso when dry paint over the top with some neutral acrylic paint, I used Crafters Choice in almond and Americana in antique white. Paint over the back front, and sides. To add more interest to the background I used a stencil and Archival ink (french ultramarine). Ink up the flourish from the stamp set in black Archival and stamp on the front of the icon down the bottom. Ink up the words in black and stamp on the left side. Next use the flitter glue on the flourish and stamp at the bottom on both sides not going up as high as the black, add some mega flakes as usual, I used Morris dance. Repeat this with the butterfly stamp, the one I used came from the Craft Stamper mag. Now turning to the back,


to create depth I used a  blue flourish I had left on my gelli plate (I'm usually working on a few things at a time so this was a bit of a cross over), I wanted to see what it would print like on a different surface and it worked well. Now using a stencil and some dark blue ink add colour just around the outside and on all the edges, blend the ink without the stencil around the front and back of the icon. Dab some flitter glue on to the small anemone corner and stamp twice on each side as above, add morris dance flake and burnish. Dab some glue around the edges, it wants to be hit and miss, then use the flakes again. To make the whole thing look a bit worn put white acrylic paint on your mat, using a fan brush load up with the paint and swipe over the icon touching here and there. That's all for this time, hope you like it.

Thanks for stopping by

Sally


Monday, 30 December 2013

Landscape


Hi crafter's

Another quick card, this is for the Clarity Stamp challenge which is all about landscape building. When the free stamp arrived in the New Design Club pack I knew I had to use it. I inked the stamp up in Adirondack purple twilight ink, stamp on to some copier paper before stamping on to my card on the left hand side. Repeat and stamp on to the right side a little lower. Ink up the forest ridge the same way and stamp down at the bottom. To create the land and ground the trees I used a stencil I got from Inylicious, this saves using copier paper. To colour I used a combination of the purple, peach bellini and a little pink. Make a sun mask and place over the hills in the background. Colour round the mask with peach bellini. Blend purple ink then black around the edges with a brush. When satisfied with the colour remove the sun mask and add a little peach bellini to tone it down and take away the whiteness. Mat on to a piece of white card then on to purple. To finish stick on to a DL white base card, this will accentuate the landscape design. That's all for this one. Hope you like it.

Happy crafting
Sally

Something festive


Hi crafter's

Now that Christmas is over and I have some spare time before the new year I thought I would quickly get my entry done for the Crafty Individuals challenge, which is something festive. I have just recently bought this Santa stamp and I have to say I love it, add a little colour and it looks perfect! Ink up the Santa stamp with pearlescent ivy Brilliance ink and stamp in the centre of a piece of square white card. Colour the face and hair with colouring pencils, then add colour to the background with a make-up sponge and some beige ink. Make the colour more intense around the figures. Mask the Santa stamp. The background was created using the Christmas calligraphy stamp and the snowflake from the let it snow calligraphy stamp. Ink up the Christmas calligraphy stamp in Adirondack in cranberry and stamp down one side. On the other side stamp the snowflake in VersaMagic in sage and then with Versamark embossed in gold. Blend cranberry ink around the edge with a blending brush. Run a gold pen around the edge. On the base card stamp a floral corner in cranberry as shown. Stick the topper in the centre. Add some bows and beads (these came from some crackers we had a previous year) with silicone glue. That's about it for this one.
Hope you all had a lovely Christmas.

Thanks for stopping by.

Sally

Friday, 6 December 2013

Inky splatters


Hi crafters

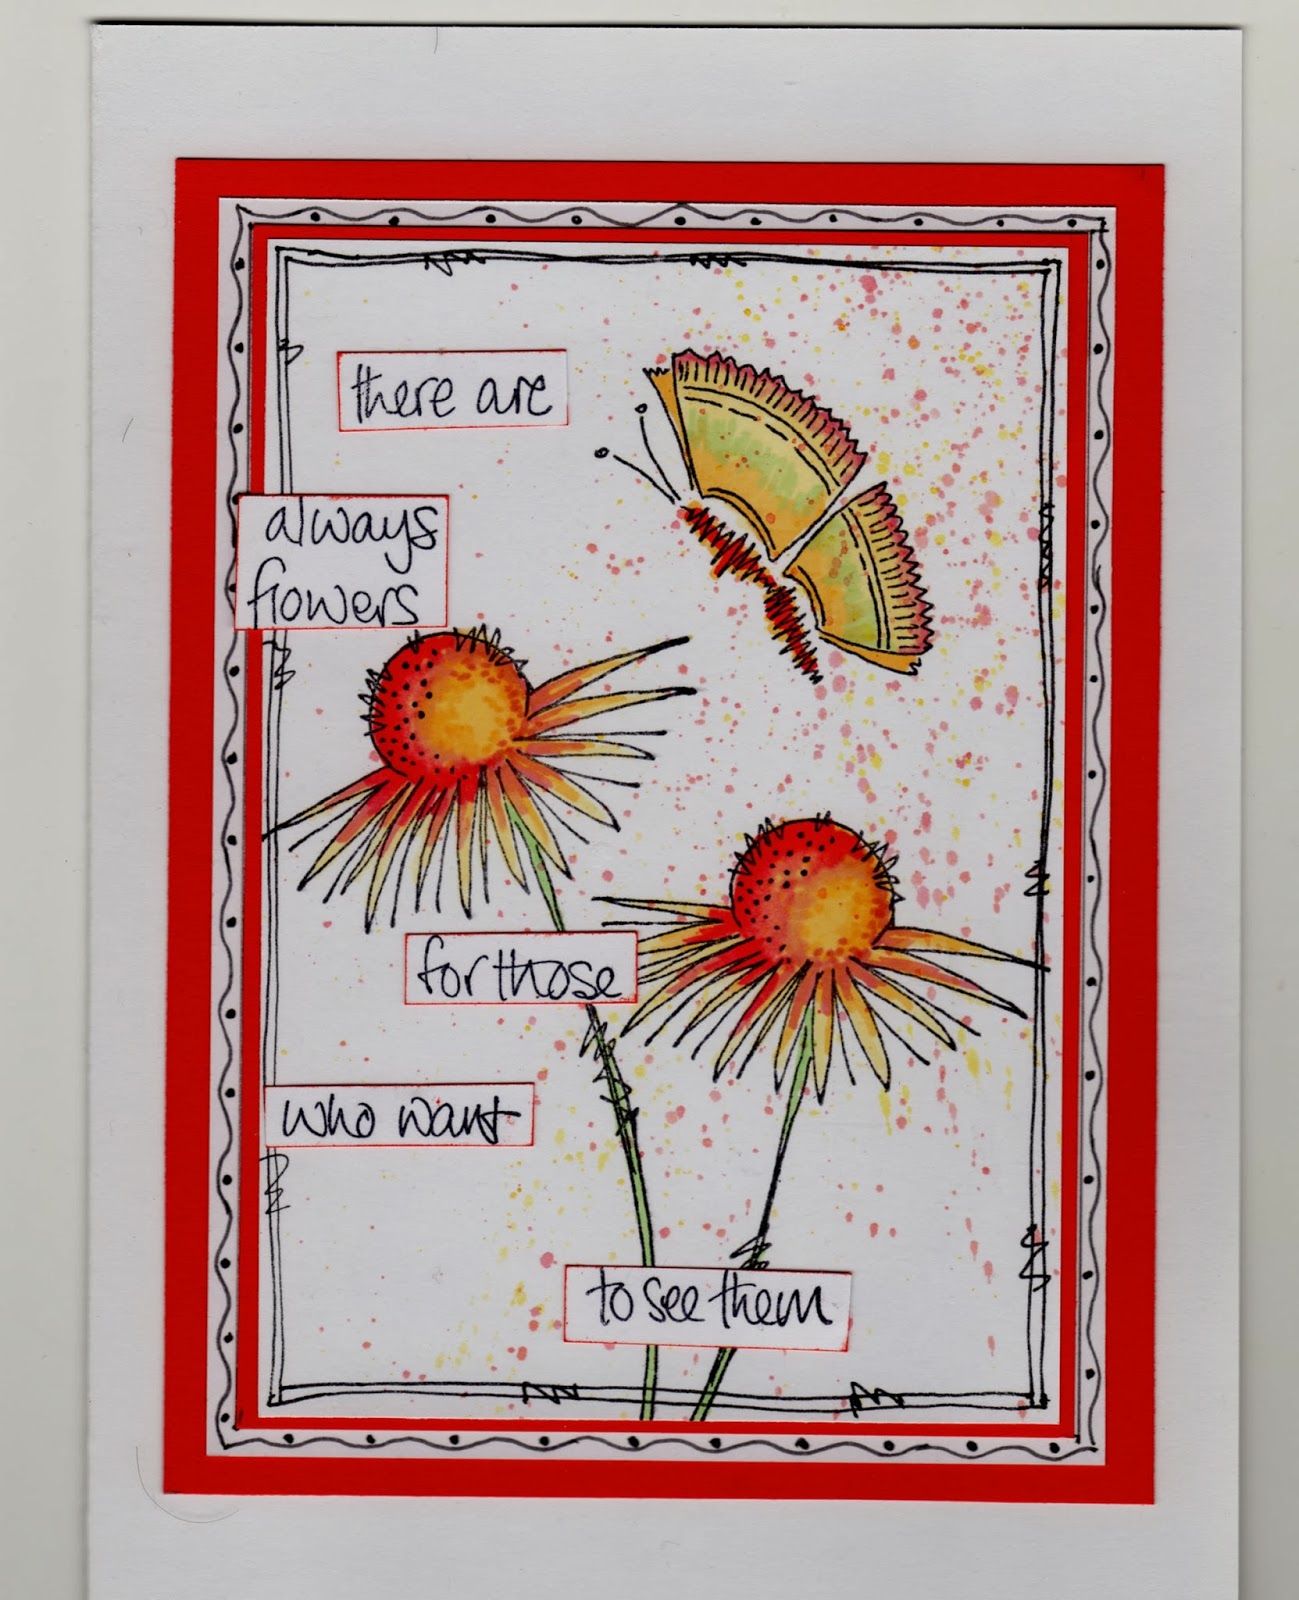
This is my entry to the craft stamper magazines challenge, it's all about splatters. I have used some of the JOFY stamps for this. Ink the stamps up with black Memento then colour in with Promarkers. Put some distress ink on to the craft mat and spritz with water then using a paint brush flick the colour over the flowers and butterfly, concentrating more colour near the top right hand side. Draw a frame round the edge with a fine liner pen, draw two lines then some squiggly lines to match the stamps. Mat on to some red card then on to white card. Hand draw a wavy line and some dots with the black pen. Mat on to another piece of red card then on to the white base card. Stamp the words and cut in to pieces, run some red ink around the edges. Arrange where you want them to be and stick with glue. That's it for this time, hope you like it.

Thanks for looking

Sally

Thursday, 28 November 2013

Frosty Christmas


Hi crafter's

Getting a little behind with the challenges lately but the positive is my Christmas cards are coming along nicely. This card is my entry for the Claritystamp challenge called Christmas. To create this card I have used the church, spruce scape, I heard a bird verse, miniature snowflake corner and the merry christmas stamp. First I cut a 5" square piece of white card and stamped the verse all over with Archival ink in french altramarine. Use second generation stamping and stagger so you don't get lines. Ink up the church in french ultramarine and stamp just below half way. Now stamp the spruce scape, only ink up half the trees so they can be put either side of the church. Mask off the church and create some hills in the background, I used denim ink and a sponge for this. Drag denim ink from the bottom of the trees down to make shadows. Add a little colour to the trees with purple twilight ink. Wipe over with an anti-static bag then ink up the Merry Christmas with black Versafine ink and stamp over the trees and church. Sprinkle with clear embossing powder and heat. Take a piece of sequin waste and lay across the corner, blend some purple over with a blending brush. Do this all the way round not going too far in from the side. Then go back round without the sequin waste just going over the edge in denim. Stamp the snowflake corner in purple then join the corners up with wiggily lines using a purple fine line pen. Draw some birds flying around the church spire. Mat on to some silver mirri card then on to a white base card. To add some sparkle run some crystal glitter glue along the bottom of the trees and church. That's it for this card, hope you like it.

Thanks for stopping by

Sally

Monday, 18 November 2013

chocolate orange


Hi crafter's

Just finished my entry for the Indigoblu challenge, and just in time! The theme is chocolate orange so I have used wild honey and spiced marmalade distress inks, also coffee adirondack ink. The first thing I did was to die cut a circle in Clarity coated card stock and put a small circle mask in place. Put the distress inks on to a splodge mat and using a brayer colour the background starting with the wild honey, then adding the spiced marmalade. Ink up the stamp (I have used the boxing hares that came free with Crafter Stamper magazine) with coffee adirondack ink. Stamp on to a scrap piece of paper first to take some ink off before stamping onto the coated card stock. Stamp right down at the bottom of the circle, there will be a gap so turn the stamp upside down and fill the space. Now ink up the flourish from Wild Meadow set with coffee ink and stamp around the top edge. Ink up the same stamp with Versamark and heat emboss using copper powder, do this top and bottom. On to the base card, stamp flourish in coffee ink in each corner. To create the circle design I used a Mister Huey stencil inked through with wild honey and spiced marmalade. Blend the colours out to nearly nothing at the sides. To frame the card I used Versamark ink which I swiped around the edge so it is uneven then add the copper powder and heat emboss. Quite an easy card but I do like the circle stencil. That's all for now.

Happy crafting

Sally

Thursday, 14 November 2013

Vintage Santa


Hi crafter's

It's been awhile but here is my first Christmas card this year. I bought a few things from Crafty Individuals recently and I have used most of them in this design. To make the background I used the Calligraphy Christmas words which I inked up with Versamark and heat embossed with Seafoam white powder. Stamp down the right hand side of a piece of white card. Next hold the Christmas tree stencil down on the left hand side. Blend Cranberry Adirondack over the stencil then go all around the edge and over the embossing. When the colour is built up enough take a soft tissue and rub off any ink that is left on the embossing. Now ink up a snowflake and emboss with gold powder, keep in mind where the topper is going to be. To soften the edge I rubbed some gold Inka Gold. The topper is quite simple to do. Take a slightly bigger piece of card than the stamp, ink up the Vintage Santa stamp with Versafine black ink then colour in with some colouring pencils. Use a darker red pencil around the edge to draw your eye in. Lay the stencil down on the right hand side of the topper, only use part of the tree not going over Santa too much. Then blend softly around the stamping with  Cranberry ink. Mat topper and background on to gold mirri card then attach to a white square base card. The ribbon and beads are actually off some crackers we had a few years ago so really good for the Christmas card. Stick down with dimensional glue. That's about it for now hope you like it.

Thanks for stopping by

Sally
Powered by Blogger.