Thursday, 25 July 2013

Fairy Queen


Hi crafters

This card was made for the Lavinia Stamps challenge. In this months challenge you must use a die cut or punch, I have used a flourish die cut and some nestabilities. Firstly I die cut the nestabilities in two sizes and stamped the fairy, foliage, toadstools and bee onto the smallest one. I used promarkers to colour her in using various skin tones and ginger, soft green and dusky pink.  Add colour around the edge using dried marigold distress ink and a blending brush. Colour the second layer with victorian velvet the same way but leave the die in place so you get the white edge. On the white base card ink through the moraccan mask from That Special Touch with dried marigold, fading out around edge. Now cut out two flourishes and colour them with tea green promarker. I used a wet glue to stick everything down this allows me to tuck the flourishes is place. Lastly add glitter glue on her wings and head and dotted around the foliage. That's all this time, quite a quick card for a change. Hope you like it.

Thanks for looking, happy crafting.

Sally


Saturday, 20 July 2013

By the sea


Hi crafter's

This is going to be my entry for the Clarity stamp challenge, the theme is Oh I do like to be beside the seaside. My inspiration for this was the glass bottom boats tourists use to see the marine life without getting wet, and the perfect thing for this was the rowing boat by Tando Creative. The first thing I did was paint all the pieces with acrylic paint, I used teal but added some white for a lighter colour. My boat is made up of four layers, the back piece, two edge pieces that have no centre( this will give depth ) and the front. I have loads left over from this kit for other projects. When the paint was dry I loaded a dry fan brush with white acrylic and lightly swiped over the front and back to give a weathered look. Whilst I had the acrylics out I painted one of the oars making it more white than the boat so it will stand out. Now for my under the water scene. First I used the the back of the boat as a template and cut out a piece of white card, then coloured with the chisel end of the promarkers. You don't have to be too perfect or blended just go from side to side. I used dark and light blue plus some green, you don't want it too dark where you're going to stamp. Now for the fun bit, you need some isopropyl alcohol, or blending solution and a pipette. Isopropyl is a lot cheaper than blending solution and is easy to buy on the internet. Fill the pipette and scatter drops of alcohol all over,the marker pens will  start to move and form the bubbles. Don't be too heavy handed you can always add more. Using a black Memento ink pad stamp the coral and fishes then colour in with promarkers. I then used some glossy accents to make the bubbles coming from the fishes mouths. When this is finished stick to the bottom of the boat then add the two edge pieces on top. Before sticking the top piece in place stamp the word water at the bottom. The stand was made from a left over piece from the boat kit. I wanted to colour the stand with my alcohol inks but chipboard is no good for this, so to make it into a surface I could use I painted it with white metallic acrylic paint, then coloured the usual way with stream, stonewashed and caramel. You can only do this with metallic paints any others will not work. To attach the boat to the stand I cut a small triangle of greyboard and bent this in half, I used a hot glue gun to stick this to the stand and then stuck the boat to the triangle. The oar was attached leaning at an angle on the boat . To finish I used peel offs for the shells and starfish coloured with promarkers and a piece of string to moor the boat.
That's all this time, hope you like it.

Thanks for looking

Sally

Wednesday, 17 July 2013

Sunny days


Hi crafter's

This is my entry to the Indigoblu challenge, the theme is summertime. For this card I used Wild Meadow and Grand Tour 1 stamps, the ink is Kaleidacolor in Bouquet, this pad has five rainbow colours in it. First I made the background by stamping the flourish with Versamark and embossing with clear powder, just in the right hand corner. To colour I loaded up my brayer with Bouquet ink and blended the ink on my splodge mat. The reason I did this is because the colours are quite bright and I wanted  more muted shades. Now run the brayer diagonally from the bottom up until nearly in the middle. Turn the piece of card round and repeat. Next heat up your iron, no steam, lay some copier paper over the embossing and heat. The powder will melt and stick to the paper, If it doesn't all come off repeat but use a clean area of the paper. This is called faux batik which gives a lovely effect. To add interest to the background I used sequin waste a piece of sponge and the ink left on the splodge mat, then added the colour randomly but not in the lightest area in the centre. For the topper I inked up the butterfly using all the colours in the Kaleidacolor ink pad and stamped on a square piece of card. Make a mask for the butterfly then stamp the sentiment from the Grand Tour 1 all over the card. Lift off the mask and blend the butterfly with a water brush. Use the sequin waste and inks as before on two opposite corners, blend around the edges. Mat on to a complementary piece of card. Glue everything in place. I then used some rub-on's I had in my stash for the sentiment. Quite a quick card really. a bit too hot to sit for ages.

That's all hope you like it, thanks for looking

Sally

Sunday, 14 July 2013

Pink Lily


Hi crafter's

It's been a while since my last post so I thought I would share with you the card I have made for my mother-in-laws birthday. Just recently my seahorses card was picked as a winner in the Crafty Individuals challenge, I was really surprised and very pleased .My prize was to pick a stamp, a difficult thing to do but I chose the Lily background which I have used in this card. The first thing I did was to stamp a fan, and a selection of perfume bottles from stamp set CI-335 on to white card with Versamark ink and embossed with clear powder. Then coloured the whole thing with adirondack Cranberry and Butterscotch inks. Now heat an iron, not too hot and no steam. Protect your surface with a few pieces of copier paper and put a piece of paper over the card, then iron over the top. The embossing powder will melt, lift the paper and if any embossing is left repeat but use a clean piece of paper. This is called faux batik and gives a lovely effect. To finish I ran a black alcohol marker around the edge. Taking the lily background I stamped this with Cranberry ink then blended with a water brush. I also coloured in the centre of the lilies with a yellow pencil. As before I blended the inks to colour the background and went round the edge with the marker. Next I stamped the cameo from the stamp set and embossed with black powder, then coloured in with promarkers and blended around the edge. To finish I die cut a tag and stamped a perfume bottle. I had a few paper flowers in my stash so I coloured these to match and added pearls. Everything was layered up as seen in the picture. Hope you like the card and will try the faux batik technique yourselves.

That's all, thanks for looking any comments welcome.

Sally


Wednesday, 26 June 2013

Seahorses


Hi crafter's

I have made this card for the Crafty Individuals challenge sea, sun and beach. I love this little seahorse stamp so decided this is what the whole design would be about. This card is very easy to do. I have used a 6'x6' white base card which I splatted some mica inks randomly in the centre. Then whilst still wet blew through a straw to make trails. This is supposed to represent seaweed so I used blue, sea green and yellow inks. I then stamped the seahorse in black Versafine, then coloured in with Sakura stardust pens. The bubbles stamp was just one I had in my stash. To add interest to the background I blended some denim adirondack ink in the centre and used a small lid to stamp the circles. I stamped the word sea shells then inked up the shell stamp in peacock feathers and denim, cut them out and blended the ink around the edge with a water brush. I glued one under the words and the other over hanging the edge, cutting off the excess.
That's all for this card, hope you like it.

Happy crafting

Sally

Monday, 24 June 2013

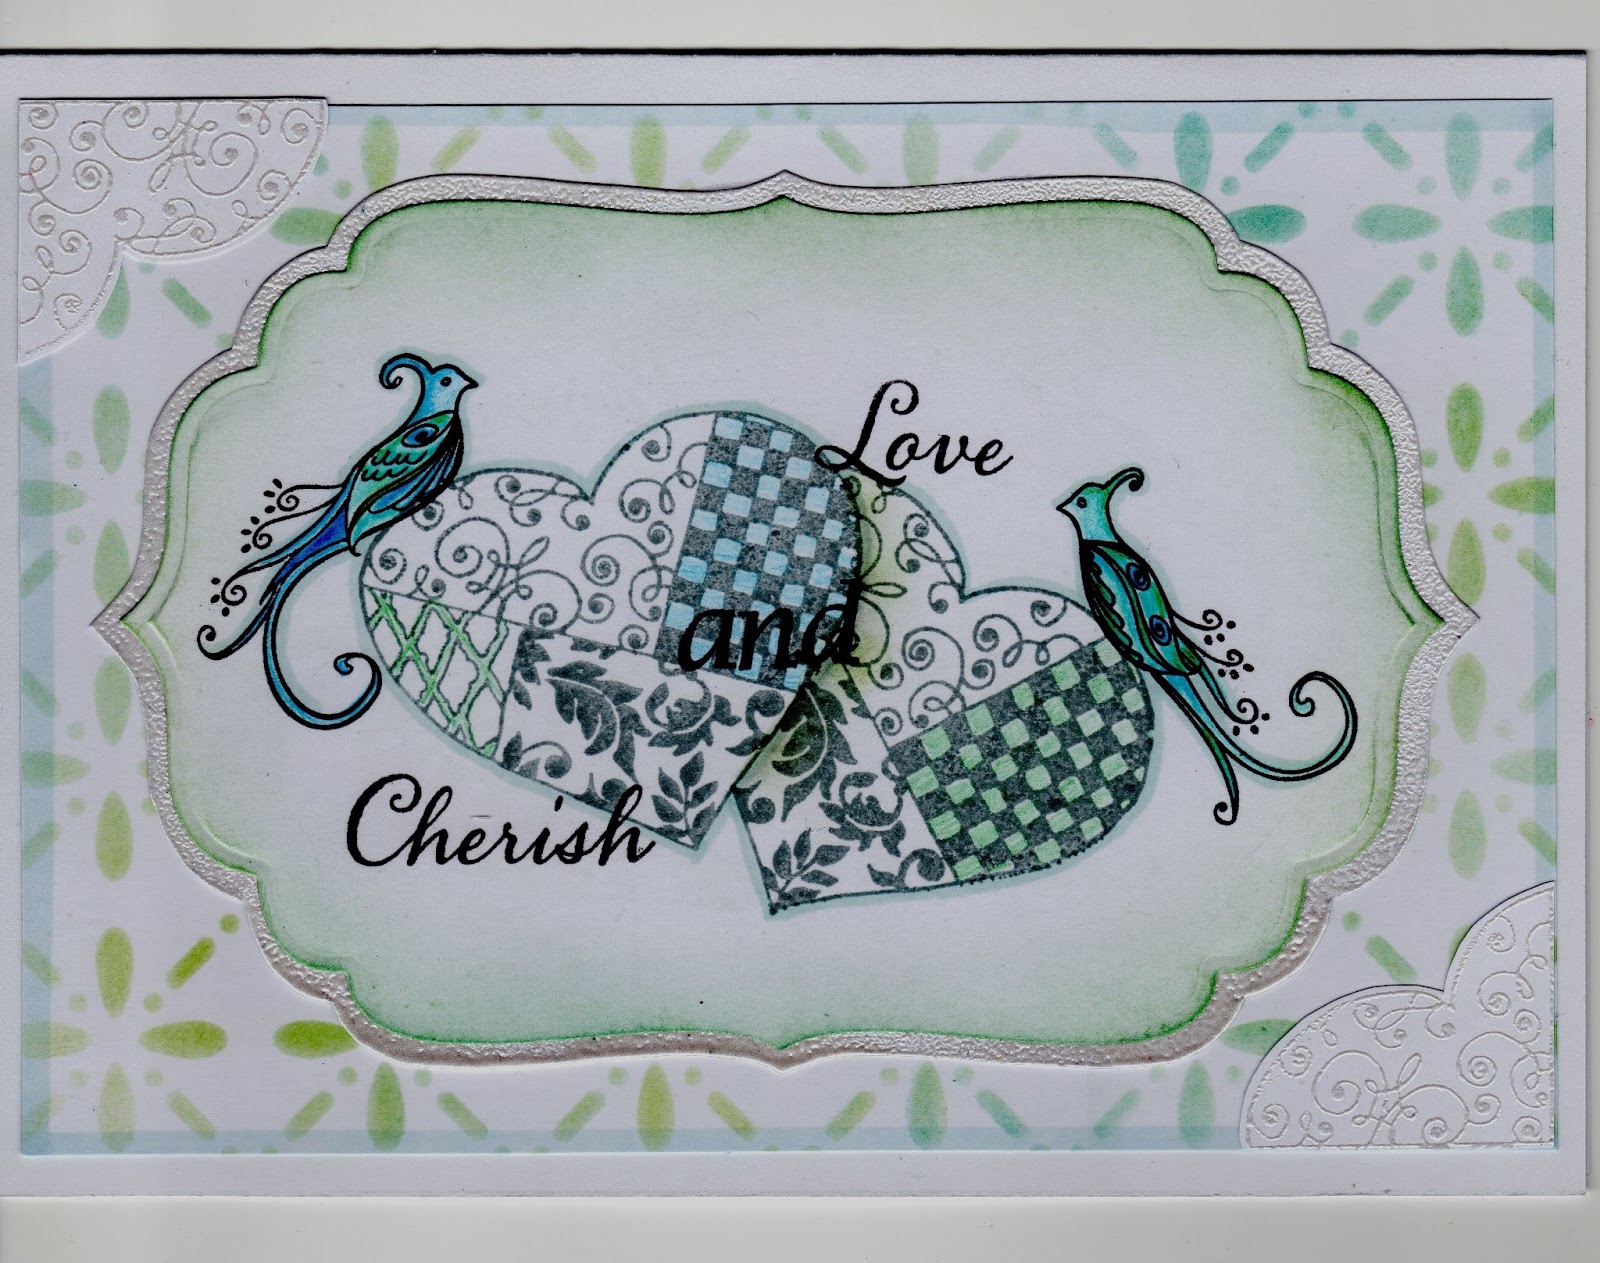
Mr and Mrs


Hi crafter's

This is my entry to the Clarity Stamp challenge. I've used a colour combination of soft blues and greens with some pearly embossing powder. The stamps I used are from the birdcage set, the arty heart and the letterbox set. First I stamped the heart in memento London Grey, masked it then stamped the second heart slightly lower. Next I stamped the birds in place with black ink and lastly the words. I coloured the birds in with pencils and added a little colour to the hearts. I went round everything with tea green promarker and added some shadow between the hearts. Then I cut this out with a grande Labels four and blended ink around the edge. I also cut the next size up out of white card, this was then inked up around the edge with Versamark and embossed with silver pearl powder. To create the background I used the Delicate mask and inked through with Broken China and Bundled Sage keeping the colours quite pale. I run a pale blue promarker around the edge. Stamp two hearts on white card and emboss with the powder. Cut out the top part of the heart. To finish the card I glued the background onto a white base card. then stuck the pieces of embossed heart in the corners. The topper was glued to the embossed label then attached to the card.
Hope you like it, thanks for looking.

Happy crafting

Sally


Tuesday, 18 June 2013

lilac fairy


Hi crafter's

Back again! This card was made using just Lavinia stamps and will be entered into the blog challenge. To start I stamped the fairy on the toadstool with Versamark in black then embossed with clear powder. I then die cut a circle using a post-it note, this will be the moon. The challenge is about the colour lilac so I used dusty concord distress ink and purple twilight adirondack ink, I also used a little bit of blue to create a bit of contrast and make the purple stand out. I put the mask where I wanted the moon to be then using ink dusters and the inks built up the colour around the edge. I used just the lilacs around the fairy. I loaded up the brush then starting from the fairy I swept the colour out, but not too far, leave a very light area around the fairy. Then take off the mask and do a few brush strokes to make lines of ink to look like clouds. I stamped around the edge with assorted foliage stamps using all the inks and repeat stamping to create light and shade. Also stamp around the base of the toadstool to anchor it. I used pencils to colour the toadstool and also to darken the purple around it. To colour the wings I used picket fence distress marker, this will cover any ink left from doing the background. Using black ink I added the butterflies, then the stars in purple.Lastly I run a purple promarker around the edges and added some glitter glue round the fairy.

That's all this time, happy crafting.

Sally

Powered by Blogger.